
ge gas range self cleaning instructions
The GE Gas Range Self-Cleaning Feature offers a convenient and efficient way to maintain your oven․ Using high heat, it turns food residue into ash, eliminating the need for harsh chemicals․ This eco-friendly solution saves time and effort, ensuring a cleaner oven with minimal scrubbing required․ Perfect for busy households, it provides a safe and effective cleaning process․
1․1 Understanding the Self-Clean Mechanism
The GE Gas Range Self-Clean Mechanism uses high heat to decompose food residue into ash, eliminating the need for scrubbing or harsh chemicals․ During the cycle, the oven reaches temperatures of up to 880°F (471°C), effectively breaking down tough stains and grime․ The process is eco-friendly, as it reduces the need for chemical cleaners, and it’s designed to operate safely when the oven is properly prepared․ This mechanism ensures a deep clean without manual effort, making maintenance easier and more efficient for homeowners․
1․2 Benefits of Using the Self-Cleaning Cycle
The self-cleaning cycle on your GE Gas Range offers numerous benefits, making oven maintenance efficient and stress-free․ By using high heat to turn food residue into ash, it eliminates the need for harsh chemicals, reducing exposure to toxic fumes and protecting the environment․ This feature saves time, as it automates the cleaning process, and requires minimal effort․ Additionally, it ensures a deeper clean compared to manual scrubbing, leaving your oven looking like new․ The cycle is also designed with safety in mind, providing a secure way to maintain your appliance without risking damage or personal harm․

Preparing Your GE Gas Range for Self-Cleaning
Before initiating the self-cleaning cycle, ensure your GE Gas Range is properly prepared․ Remove oven racks, utensils, and accessories, and wipe down the interior to loosen food residue․ Protect flooring with a heat-resistant mat or old sheets to catch ash and debris․ This preparation ensures a safe and effective cleaning process while preventing damage to surrounding surfaces․
2․1 Removing Oven Racks and Accessories
Start by removing all oven racks, baking sheets, and accessories from the oven cavity․ This ensures unobstructed access for the self-cleaning cycle․ Place racks in a heat-resistant container or wrap them in foil to protect them during the high-heat process․ For racks with heavy residue, scrub them manually before replacing․ Removing these items prevents damage and allows the self-clean feature to operate effectively․ Always handle racks with oven mitts or tongs to avoid burns․ Once removed, set aside and let the oven focus on cleaning the interior surfaces thoroughly․
2․2 Wiping Down the Oven Interior Before the Cycle
Before initiating the self-cleaning cycle, lightly wipe the oven interior with a damp cloth or paper towel to remove loose food particles․ Avoid using harsh chemicals, as they may release harmful fumes during the high-heat cleaning process․ Focus on large debris and spills, as the cycle will handle tough residue․ Protect racks or accessories by covering them in foil or removing them entirely․ Do not clean the oven door gasket or window with abrasive materials, as this could damage the finish․ This step ensures the cycle runs efficiently and prevents excessive smoke or odors during cleaning․
2․3 Ensuring Proper Ventilation

Proper ventilation is crucial before and during the self-cleaning cycle to prevent harmful fumes from circulating in your kitchen․ Open windows and turn on exhaust fans to improve airflow․ Activate the range hood to vent out smoke and odors effectively․ Ensure the kitchen is well-ventilated to avoid inhaling fumes produced by burning food residue․ Keep the room occupied or check periodically to monitor the process․ Proper ventilation not only enhances safety but also ensures the cycle operates efficiently, leaving your oven clean and odor-free after completion․

Initiating the Self-Cleaning Cycle
Select the self-clean mode on your GE range, choose the desired duration, and start the cycle․ Ensure the oven is empty and vents are open for safety․
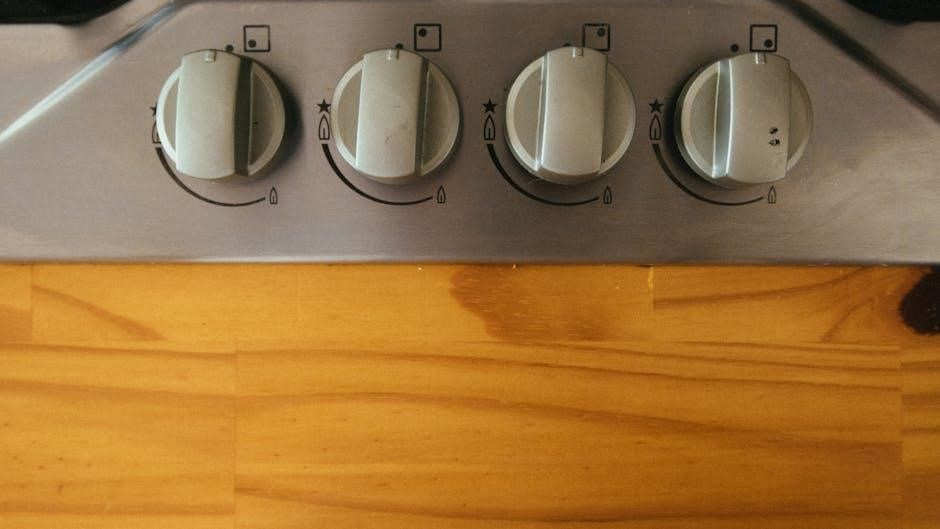
3․1 Setting the Self-Clean Mode on Your GE Range

To initiate the self-cleaning cycle, press the Self-Clean button on your GE range’s control panel․ Use the arrow keys to select the desired cleaning duration, typically 2-4 hours, depending on soil level; Ensure the oven is empty of racks and accessories․ Once selected, press Start to begin the cycle․ The oven door will automatically lock to ensure safety during the high-heat cleaning process․ The oven will reach extreme temperatures, turning food residue into ash․ Always follow the manufacturer’s guidelines for optimal results and safety․
3․2 Selecting the Correct Duration for the Cycle
Selecting the correct duration for the self-cleaning cycle on your GE gas range is essential for optimal results․ The cycle typically ranges from 2 to 4 hours, depending on the level of soil inside the oven․ For light soil, a 2-hour cycle is sufficient, while heavier residue may require the full 4 hours․ Always refer to your specific model’s manual for recommended durations, as instructions may vary․ Once the duration is selected, the oven will automatically lock and begin the high-heat cleaning process․ Ensure the oven is empty and racks are removed before starting․
3․3 Starting the Cycle and Safety Precautions
To start the self-cleaning cycle, press the Self-Clean button on your GE gas range and select the desired duration using the control panel․ Ensure the oven is empty and all racks are removed․ Once set, the oven will automatically lock to prevent opening during the high-heat cycle․ Keep the kitchen well-ventilated to avoid fumes․ Never leave the oven unattended during the cleaning process․ Avoid storing items like plastic or foil in the oven, as they may melt or catch fire․ Always keep children and pets away from the oven while it is in operation․ After starting, let the cycle complete without interruption․
Post-Cleaning Maintenance
After the self-cleaning cycle, allow the oven to cool completely before wiping away ashes with a damp cloth․ Clean the oven door and exterior surfaces for a polished look․
4․1 Allowing the Oven to Cool Down Completely
After the self-cleaning cycle, it’s essential to let the oven cool down entirely before proceeding with any maintenance․ Turn off the oven and allow it to sit undisturbed for several hours․ This ensures all internal components return to a safe temperature, preventing accidental burns or damage․ Avoid opening the oven door during this time, as the extreme heat can still be hazardous․ Once the oven has cooled completely, you can safely proceed to wipe away ashes and clean the interior․ This step is crucial for both safety and effectiveness in maintaining your GE gas range․
4․2 Wiping Away Ashes and Residue
After the oven has cooled completely, use a damp cloth or paper towels to wipe away the ashes and residue left behind by the self-cleaning cycle․ This step is crucial for maintaining the oven’s cleanliness and efficiency․ Avoid using abrasive cleaners or scrubbers, as they may damage the interior finish․ Instead, lightly dampen the cloth and gently sweep away the ash, ensuring no particles remain․ For tougher residue, a soft sponge or non-abrasive cleaner can be used sparingly․ Properly disposing of the ashes completes the cleaning process, leaving your GE gas range ready for its next use․
4․3 Cleaning the Oven Door and Exterior
Cleaning the oven door and exterior is essential for maintaining the appearance and hygiene of your GE gas range․ After the self-cleaning cycle, remove any large food particles from the door and wipe it down with a mild detergent and a soft cloth․ For tough stains, mix baking soda and water to create a paste, apply it to the stained areas, and let it sit before scrubbing gently․ Regularly cleaning the exterior with a damp cloth prevents grease buildup․ Pay special attention to the door gasket and handles, as these areas can harbor residue․ Rinse the cloth thoroughly to avoid streaks and ensure the exterior remains spotless․

Troubleshooting Common Issues
If the self-clean cycle stops or leaves residue, check the power supply, ensure the door is sealed, and clean the gasket․ Refer to the manual or contact GE support for assistance․
5․1 What to Do If the Self-Clean Cycle Stops Working
If the self-clean cycle stops working, first ensure the oven is cool․ Check the power supply and circuit breaker․ Verify the oven door is properly sealed and the gasket is clean․ For models like JGBP3GEV1AD, consult the manual or GE support․ If the issue persists, inspect the clock/timer control board (e․g․, WB12K0020) for malfunctions․ Resetting the cycle or replacing faulty parts may be necessary․ If unresolved, contact GE Appliances at 1-800-432-2737 for professional assistance․ Always follow safety guidelines to avoid hazards during troubleshooting․
5․2 Addressing Uneven Cleaning or Residue Left Behind
If the self-clean cycle leaves residue or cleans unevenly, ensure racks and accessories were removed․ Wipe the oven interior before starting the cycle to reduce heavy buildup․ Proper ventilation is key; check for blockages in vents․ After cooling, use a damp cloth to remove ash․ For persistent residue, repeat the cycle or manually clean with a gentle scrubber․ Avoid harsh chemicals․ If issues persist, consult the GE manual or contact support․ Ensure the gasket is clean and properly sealed for optimal performance․ Regular maintenance can prevent future uneven cleaning․