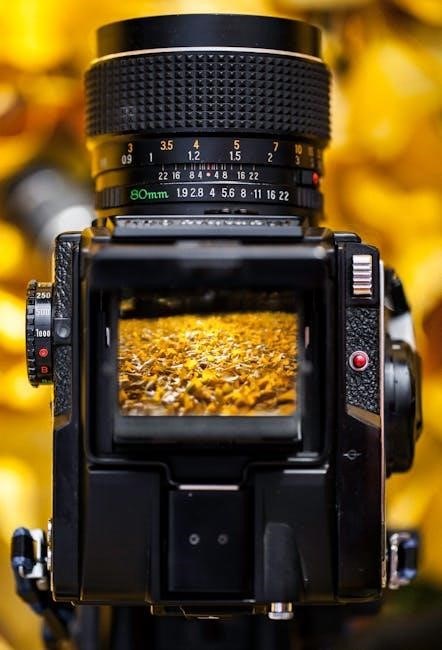
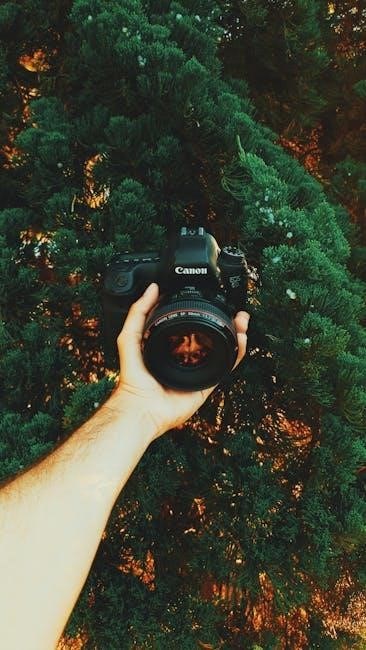
manual camera cheat sheet
Manual camera settings empower photographers to unlock creative control, offering precision over aperture, shutter speed, and ISO. A cheat sheet simplifies mastering these essentials for stunning results.
1.1 Why Manual Mode is Essential for Creative Control
Manual mode is a game-changer for photographers seeking creative control. It allows precise adjustments to aperture, shutter speed, and ISO, enabling unique artistic expressions. Unlike auto mode, manual settings empower photographers to dictate depth of field, motion effects, and light sensitivity, ensuring every shot aligns with their vision. This control is especially vital in challenging lighting conditions, where auto modes often fall short. A manual camera cheat sheet simplifies mastering these settings, helping photographers unlock their full creative potential and produce stunning, professional-quality images consistently.
1.2 Understanding the Exposure Triangle
The Exposure Triangle is the foundation of manual photography, comprising aperture, shutter speed, and ISO. These three elements work together to control light intake and achieve balanced exposure. Aperture regulates depth of field, shutter speed captures motion, and ISO adjusts light sensitivity. Mastering their interplay is crucial for creative control, allowing photographers to craft images with precision and artistry. A cheat sheet simplifies this process, ensuring photographers can quickly adjust settings to capture their desired visual outcomes effectively.
Mastering the Exposure Triangle
Mastering the Exposure Triangle—aperture, shutter speed, and ISO—is key to manual photography. These elements work together to balance light and achieve desired effects, guided by a cheat sheet for optimal results.
2.1 Aperture: Controlling Depth of Field
Aperture, measured in f-stops, regulates light entry and depth of field. Lower f-numbers (e.g., f/2.8) create shallow focus, blurring backgrounds for portraits. Higher f-numbers (e.g., f/8) sharpen more of the image, ideal for landscapes. Mastering aperture allows precise control over light and composition, enhancing creativity in photography.
2.2 Shutter Speed: Capturing Motion and Blur
Shutter speed controls motion and blur, with slower speeds (e.g., 1/30s) creating artistic blur, while faster speeds (e.g., 1/1000s) freeze action sharply. Adjusting this setting allows photographers to capture dynamic effects, from silky waterfalls to crisp sports shots. Balancing shutter speed with aperture and ISO ensures proper exposure, enabling creative control over motion and light in various scenarios.
2.3 ISO: Managing Light Sensitivity
ISO adjusts your camera’s light sensitivity, with lower values (e.g., 100-200) minimizing noise for bright conditions and higher values (e.g., 6400) capturing images in low light. Balancing ISO with aperture and shutter speed is crucial for optimal results, ensuring minimal noise while maintaining proper exposure. This setting is essential for adapting to various lighting scenarios, from sunny landscapes to indoor portraits, allowing photographers to achieve their desired aesthetic without compromising image quality.
Metering Modes and Light Metering
Metering modes help measure light to achieve proper exposure. Options like center-weighted, spot, and matrix metering offer flexibility, ensuring accurate light assessment for various shooting scenarios and lighting conditions.
3.1 Types of Metering Modes
Understanding metering modes is crucial for accurate exposure. The three main types are center-weighted, spot, and matrix metering. Center-weighted averages light across the frame, weighting the center. Spot metering measures light from a specific area, ideal for precise control. Matrix metering analyzes multiple zones for balanced exposure, adapting to complex lighting scenarios. Each mode offers unique benefits, allowing photographers to tailor light measurement to their creative vision and achieve optimal results in various conditions.
3.2 How to Use the Light Meter Effectively
Mastering the light meter is essential for balanced exposures. Start by centering the meter, adjusting aperture, shutter speed, or ISO as needed. In challenging lighting, use spot metering on key areas to ensure proper exposure. Monitor the meter’s movement and compensate by tweaking settings. This approach ensures your images are neither too bright nor too dark, capturing the desired mood and detail effectively in every shot, regardless of lighting conditions.
Practical Tips for Beginners
Begin with aperture or shutter priority modes to build confidence. Practice in ideal lighting and gradually transition to full manual mode for better control and creativity.
4.1 Starting with Aperture or Shutter Priority Modes
Beginners can build confidence by using aperture or shutter priority modes. These modes allow control over one setting while the camera adjusts the other, simplifying the learning process. Start with aperture priority to focus on depth of field or shutter priority to capture motion. Use lower ISO settings for clearer images and adjust as needed. Gradually transition to full manual mode as comfort grows, ensuring a smooth progression in mastering camera settings effectively.
4.2 Practicing in Ideal Lighting Conditions
Beginners should practice manual settings in optimal lighting, such as soft natural light, to minimize challenges. Start with low ISO for minimal noise and adjust aperture or shutter speed based on the scene. Well-lit environments make it easier to understand how settings interact. Use a tripod for stability and experiment with different compositions. Gradually move to more complex lighting scenarios as skills improve, ensuring a solid foundation before tackling challenging conditions effectively and confidently.
4.3 Gradually Mastering Full Manual Mode
Transitioning to full manual mode requires patience and practice. Start by building on the skills gained from aperture or shutter priority modes. Begin with familiar scenes, like stationary subjects, to focus on balancing the exposure triangle. Use a cheat sheet to guide your adjustments and experiment with different combinations of aperture, shutter speed, and ISO. As you grow more comfortable, challenge yourself with dynamic scenes. Remember, mastery takes time—stay consistent, and manual mode will become second nature, enhancing your creative control and image quality.
Advanced Techniques for Manual Mode
Advanced techniques involve mastering challenging lighting and motion scenarios. Use tripods for sharp images in low light and experiment with creative effects like intentional blur or freeze frames.
5.1 Using Tripods for Sharp Images
A tripod is essential for sharp images in low-light conditions, ensuring camera stability and preventing blur. It allows slower shutter speeds without handshake, ideal for landscapes and night photography. Mounting your camera on a tripod enables precise control, especially when adjusting aperture and ISO. This setup is crucial for capturing tack-sharp details, making it a must-have tool for mastering manual mode, particularly in challenging lighting scenarios.
5.2 Shooting in Challenging Lighting Scenarios
Mastering manual mode in difficult lighting requires a deep understanding of the exposure triangle. Start by setting your aperture to control depth of field, then adjust shutter speed to manage motion blur. Use spot metering for precise light readings and gradated filters to balance high-contrast scenes. In low light, raise ISO cautiously to avoid noise. Practice bracketing shots to capture a range of exposures, ensuring you never miss the perfect moment, even in the most challenging conditions.
Common Mistakes to Avoid
Overlooking ISO adjustments in varying light, neglecting aperture changes for depth of field, and ignoring shutter speed settings for motion effects are common mistakes that can ruin shots.
6.1 Overlooking ISO Settings in Different Lighting
Forgetting to adjust ISO in varying lighting conditions is a common mistake. Using too high an ISO in bright light leads to overexposure and noise, while low ISO in dim light results in underexposed images. Always check and adapt ISO settings based on lighting to maintain optimal image quality and minimize noise. Lower ISOs (100-400) are ideal for bright conditions, while higher ISOs (800-6400) are better suited for low light, but beware of increased grain. Adjusting ISO alongside aperture and shutter speed ensures balanced exposure.
6.2 Not Adjusting Aperture for Depth of Field
Ignoring aperture adjustments can lead to incorrect depth of field, resulting in unintended focus areas. Failing to widen the aperture for portraits or narrow it for landscapes often produces unsatisfactory results. Using too large an aperture can blur important details, while too small an aperture may not isolate subjects effectively. Always adjust aperture to match your creative vision, ensuring sharp focus where needed and artistic blur elsewhere. This oversight can make photos look unprofessional, despite proper exposure and composition.
6.3 Ignoring Shutter Speed for Motion Effects
Overlooking shutter speed can result in unwanted motion effects, such as freezing fast-moving subjects when blur is desired or creating unintentional blur in static shots. Failing to adjust shutter speed for the scene ruins creative goals, like capturing dynamic waterfalls or sharp wildlife. Additionally, improper speeds can lead to overexposure or noise in low-light conditions. Always consider the motion in your frame and set the shutter speed accordingly to achieve the desired artistic or technical outcome, ensuring your images reflect your vision accurately.
The Importance of a Manual Mode Cheat Sheet
A manual mode cheat sheet is a quick guide to simplify complex settings, helping photographers recall key controls and improve their skills efficiently in various shooting scenarios.
7.1 Downloading and Using a Cheat Sheet
A manual camera cheat sheet is a quick guide to mastering manual mode, offering simplified explanations of aperture, shutter speed, and ISO. Downloadable cheat sheets provide easy access to key settings, helping photographers remember how to adjust for optimal results. They often include visual aids and step-by-step instructions, making complex concepts more approachable; Using a cheat sheet ensures photographers can swiftly adjust settings, focus on composition, and capture stunning images with confidence, especially in challenging lighting conditions or fast-paced scenarios.
7.2 Customizing Your Own Cheat Sheet
Customizing your own cheat sheet allows you to prioritize the settings and techniques most relevant to your photography style. Start by listing the exposure triangle elements—aperture, shutter speed, and ISO—and their interactions. Include personal notes, such as ideal ISO ranges for common lighting conditions or favorite aperture values for portraits. Add examples of how to balance settings for specific scenarios, like low-light or motion capture. Organize the information visually, using charts or tables for quick reference. This personalized approach ensures the cheat sheet becomes an indispensable tool for mastering manual mode.
Best Practices for Consistent Results
For consistent results, keep ISO low to minimize noise, use a tripod for sharp images, and shoot in consistent lighting conditions for reliable outcomes.
8.1 Keeping ISO Low for Reduced Noise
Keeping ISO low is crucial for minimizing noise and ensuring crisp, clean images. Start with your camera’s base ISO, typically 100 or 200, to capture sharp details without grain. In bright conditions, lower ISOs preserve image quality, while higher ISOs introduce noise, especially in shadows. For best results, use a tripod in low light to avoid raising ISO unnecessarily and maintain clarity in your photos.
8.2 Balancing the Exposure Triangle
Balancing the Exposure Triangle—aperture, shutter speed, and ISO—is key to achieving proper exposure. Start by setting one parameter, then adjust the others to maintain harmony. For instance, lowering shutter speed may require closing the aperture or reducing ISO to avoid overexposure. This balance ensures vibrant, well-lit images without blown highlights or excessive noise. Practice adjusting these settings in tandem to master the art of exposure and capture your creative vision with precision.