
r c plus thermostat manual
The RC Plus Thermostat is a wireless, programmable thermostat designed for efficient heating control․ It offers advanced features like 7-day programming, manual mode, and remote access․
Overview of the RC Plus Thermostat
The RC Plus Thermostat is a programmable, wireless device designed to optimize home heating systems․ It features a 7-day programming option, manual mode for constant temperatures, and remote control functionality․ The thermostat includes an air filter change reminder and adjustable time and temperature formats․ With a user-friendly interface and backlit display, it simplifies temperature management․ The remote controller allows users to adjust settings without physical access to the thermostat․ Compatible with various heating systems, the RC Plus Thermostat ensures energy efficiency and comfort․ Its advanced features make it a versatile solution for modern heating needs, offering both convenience and precision․
Importance of Proper Installation and Setup
Proper installation and setup of the RC Plus Thermostat are crucial for optimal performance and energy efficiency․ Incorrect wiring or configuration can lead to system malfunctions or reduced efficiency․ Following the manual ensures accurate connections and compatibility with existing heating systems․ Testing after installation verifies functionality, preventing issues down the line․ Correct setup of programs and features, like air filter reminders, enhances performance․ A well-installed thermostat ensures reliable temperature control, energy savings, and extended product lifespan․ Adhering to guidelines guarantees safe operation and maximizes the benefits of the RC Plus Thermostat for effective heating management․

Installation and Initial Setup
Mount the thermostat base using supplied screws, ensuring a secure wall installation․ Insert stripped, labeled wires into matching terminals, referencing wiring diagrams for accuracy․ Perform a test run using the remote controller to verify functionality․ Proper setup ensures reliable operation and energy efficiency․ Follow manual guidelines for correct configuration, including programming and feature activation․ This step ensures optimal performance and user convenience․ Accurate installation prevents malfunctions and maximizes system efficiency․ Always refer to the manual for specific instructions tailored to your RC Plus Thermostat model․ Ensure all connections are correct before finalizing the setup for smooth operation․
Mounting the Thermostat Base
The RC Plus Thermostat base should be mounted using the supplied screws to ensure secure installation․ Begin by locating the wall studs for optimal support․ Use a level to ensure the base is properly aligned․ Gently screw the base into place, avoiding over-tightening to prevent damage․ Ensure the base is stable and level before proceeding․ Proper mounting is crucial for accurate temperature sensing and reliable operation․ If the base is not securely fastened, it may lead to misalignment or malfunction․ Always refer to the manual for specific mounting instructions tailored to your system․ Correct installation ensures optimal performance and longevity of the thermostat․
Connecting Wires and Terminals
When connecting wires to the RC Plus Thermostat, ensure each wire is securely inserted into the correct terminal․ Strip the insulation from the wire ends before inserting them into the labeled terminals․ Match the wires to the corresponding terminals as indicated in the wiring diagram․ Proper connections are critical for system functionality․ Avoid cross-wiring, as this may lead to malfunctions․ Double-check the connections before powering on the system․ If unsure, consult the manual or seek professional assistance․ Correct wiring ensures safe and efficient operation of the thermostat and heating system․ Always follow the manufacturer’s guidelines for wiring configurations․
Performing a Test Run
After completing the installation, perform a test run to ensure the thermostat and heating system function correctly․ Turn on the power and check if the thermostat display lights up․ Test basic operations like switching between heating and cooling modes․ Verify that the system responds to temperature adjustments․ If using a remote controller, test its connectivity and functionality․ Run through a short program cycle to confirm timing and temperature settings․ If any issues arise, refer to the manual or troubleshooting guide for resolution․ A successful test run ensures your system is ready for daily use and optimal performance․ Always follow safety guidelines during testing․ Proper testing guarantees reliable operation and energy efficiency․

Understanding the Wiring Diagrams
Wiring diagrams guide the installation process, ensuring correct connections between wires and terminals for safe and proper thermostat functionality․ Follow the manual for accurate setup and troubleshooting․
Identifying Wire Labels and Terminals
Correctly identifying wire labels and terminals is crucial for proper thermostat installation․ Refer to the wiring diagram in the manual to match each wire to its corresponding terminal․ Common labels include R (power), W (heat), Y (cooling), G (fan), and C (common)․ Ensure wires are securely connected to the right terminals to prevent malfunctions․ If unsure, consult the manual or a professional for assistance․ Proper connections ensure safe and efficient thermostat operation, avoiding potential issues like incorrect heating or cooling cycles․ Always double-check connections before powering up the system․
Matching Wires to Correct Terminals
Matching wires to the correct terminals ensures your RC Plus Thermostat functions properly․ Use the wiring diagram in the manual to guide you․ Connect the R wire to the R terminal for power․ The W wire goes to the W terminal for heating, and Y to Y for cooling․ G controls the fan, and C is the common wire․ Securely insert stripped wires into their respective terminals․ Verify connections to avoid issues like incorrect operation or system malfunctions․ Proper wiring ensures reliable performance and safety․ If uncertain, consult a professional or the manual for clarity․
Programming the RC Plus Thermostat
The RC Plus Thermostat offers intuitive programming with a user-friendly interface․ Schedule custom 7-day programs or use manual mode for constant temperatures, optimizing comfort and energy efficiency․
Setting Up a 7-Day Program
To set up a 7-day program on the RC Plus Thermostat, follow these steps:
Access the Programming Menu: Use the menu button to navigate to the “Program” or “Schedule” section․
Select the Day: Choose the specific day(s) you want to program․ You may have the option to set the same schedule for multiple days or create unique schedules for each day․
Set Time Periods: Divide the day into time slots (e․g․, morning, afternoon, evening, night) and set the desired temperature for each period․
Adjust Temperatures and Times: Use the up and down arrows to set the temperature and the time for each period․
Save Settings: After setting each time period, save your changes to ensure they are retained․
Switch Modes if Needed: To temporarily override the program, switch to manual mode without affecting your 7-day schedule․
Remote Control (if available): Use a smartphone app to adjust settings remotely for added convenience․
Set Date and Time: Ensure the thermostat’s clock is accurate to synchronize your schedule correctly․
Modify Default Programs: Adjust any pre-set programs to better suit your lifestyle․

Test the Program: Run through a day to verify temperature changes occur as scheduled․
By following these steps, you can efficiently program your RC Plus Thermostat to match your daily routine and optimize energy usage․
Using Manual Mode for Constant Temperature
Manual mode allows you to set a constant temperature, overriding all programmed schedules․ To activate it, navigate to the “Mode” menu and select “Manual․” Use the up and down arrows to set your desired temperature, which will remain steady until you exit manual mode․ This feature is ideal for maintaining a consistent temperature when you’re home or have specific comfort needs․ To return to your programmed schedule, simply exit manual mode or switch back to your 7-day program․ Ensure energy efficiency by using manual mode judiciously, reserving it for when constant temperatures are necessary․

Features and Customizations
The RC Plus Thermostat offers customizable settings like air filter change reminders and adjustable time and temperature formats․ It also supports remote control functionality for enhanced convenience․
Setting the Air Filter Change Reminder
The RC Plus Thermostat includes a feature to remind you when it’s time to change your air filter․ This helps maintain system efficiency and air quality․ To set the reminder, navigate to the maintenance menu and select the filter timer option․ Choose the desired interval based on usage or manufacturer recommendations․ Once set, the thermostat will alert you when the filter needs replacement․ This feature can be adjusted or reset at any time, ensuring optimal performance and prolonging the life of your heating system․ Regular filter changes are crucial for maintaining airflow and energy efficiency․
Adjusting Time and Temperature Formats
The RC Plus Thermostat allows you to customize time and temperature formats to suit your preferences․ To adjust these settings, access the thermostat’s menu and navigate to the system preferences section․ Use the dip switches to select between 12-hour or 24-hour time formats and choose Celsius or Fahrenheit for temperature display․ You can also adjust the temperature increment levels for precise control․ Ensure to save your settings after making changes․ Refer to the manual for specific dip switch configurations to avoid errors․ This feature ensures the thermostat interface aligns with your lifestyle and system requirements․
Maintenance and Troubleshooting
Regularly clean the thermostat and check its components to ensure optimal performance․ Troubleshoot issues by verifying wire connections and consulting the user manual for effective solutions․
Cleaning and Servicing the Thermostat
To maintain optimal performance, turn off the power and remove batteries before cleaning․ Use a soft, dry cloth to wipe the thermostat’s surface․ Avoid harsh chemicals or liquids․ For internal components, gently use compressed air to remove dust․ Ensure all wires are secure and free from corrosion․ Regular servicing helps prevent malfunctions and ensures accurate temperature control․ Refer to the manual for detailed instructions on servicing and troubleshooting common issues․ Proper maintenance extends the lifespan of your RC Plus Thermostat and guarantees reliable operation․
Resolving Common Issues
If the thermostat fails to turn on, check the power supply and ensure batteries are correctly installed․ For display issues, restart the device or replace batteries․ If heating doesn’t activate, verify wiring connections and ensure the system is enabled․ Consult the manual for troubleshooting guides․ Resetting to factory settings may resolve persistent problems․ Regularly cleaning the device and checking for software updates can prevent issues․ Contact customer support if problems persist after following these steps․ Always refer to the RC Plus Thermostat manual for detailed solutions and maintenance tips․

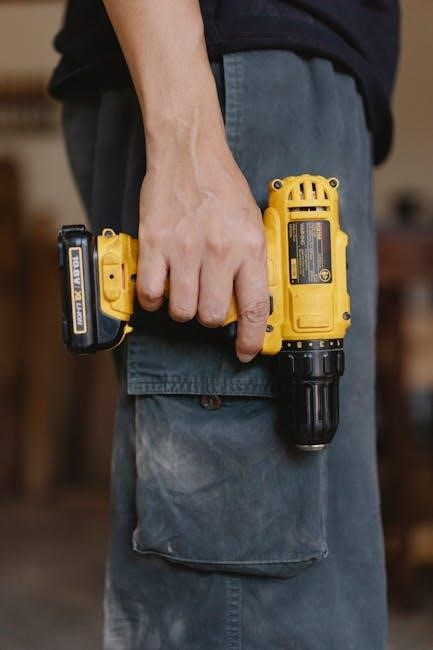
Remote Controller Operations
The remote controller allows seamless control of the RC Plus Thermostat, enabling easy temperature adjustments, scheduling, and mode changes․ Pairing ensures reliable communication for smooth operations․
Pairing the Remote Controller
To pair the remote controller with the RC Plus Thermostat, ensure the thermostat is in pairing mode, indicated by a blinking LED․ Press and hold the pairing button on the remote until the LED stops blinking, confirming the connection․ Once paired, the remote will control the thermostat seamlessly; If pairing fails, reset the remote by removing batteries or pressing the reset button․ Test the pairing by adjusting settings with the remote to ensure proper functionality․ This process ensures reliable communication between the remote and thermostat for smooth operation․ Proper pairing is essential for remote control features to work effectively․
Basic Remote Control Functions
The remote controller allows users to adjust the temperature, switch between heating and cooling modes, and access basic settings․ It also enables overriding the current program or advancing to the next scheduled setting․ Users can increase or decrease the temperature using the arrow buttons and confirm changes with the ‘OK’ button․ The remote provides real-time feedback on the thermostat’s display, ensuring seamless control․ These functions are essential for maintaining comfort without needing to interact with the thermostat directly․ Regular battery checks are recommended to ensure uninterrupted remote functionality and optimal performance of the RC Plus Thermostat system․
Advanced Remote Control Features
The RC Plus Thermostat remote controller offers advanced features, including scheduling adjustments from afar and geofencing capabilities to optimize heating based on your location․ Users can integrate the thermostat with smart home systems, enabling voice control through platforms like Alexa or Google Assistant․ The remote also supports advanced programming, such as boosting the temperature for a set period or overriding schedules․ Additionally, it provides energy usage reports to help monitor and reduce consumption․ These features enhance convenience, efficiency, and customization, making the RC Plus Thermostat a versatile and modern solution for home heating management․

Proper installation and setup ensure optimal performance․ Regular maintenance and understanding features like programming enhance efficiency․ Follow manual guidelines for extended lifespan and energy savings․
Final Tips for Optimal Use
For optimal performance, maintain consistent temperatures and use manual mode sparingly․ Regularly clean the thermostat and check battery levels․ Ensure the remote controller is paired correctly and use advanced features like scheduling․ Adjust settings seasonally and monitor energy usage․ Keep the thermostat updated with the latest software․ Always refer to the manual for troubleshooting and customizations․ Proper maintenance ensures longevity and efficiency, while smart features enhance comfort and energy savings․